

이전 글에서는 Docusaurus를 간단히 알아보고, 설치 방법, 문서 설정 및 배포 방법을 알아봤다.
이번 글에서는 간단한 테마 커스터마이징 방법, 사이드바 관리 방법, Utterance 를 이용한 소셜 댓글 추가 방법, Algolia 문서 검색을 연결하는 방법, PWA 설정 방법 등을 다뤄보겠다.
테마 커스터마이징
Docusaurus는 “Little to learn”, “Intuitive” 라는 디자인 원칙에 따라 직관적이고 쉽게 커스텀할 수 있도록 구성되어 있다.
웹페이지를 구성하는 Navbar, Footer, CodeBlock 등에 대한 설정이 docusaurus.config.js 파일으로 추상화되어 있어서 코드를 건드리지 않고도 쉽게 설정할 수 있다.
CodeBlock
Docusaurus는 Prism React Renderer 를 사용해서 코드 블럭을 하이라이팅 한다. 기본적으로는 Palenight를 사용하는데, 사용가능한 테마 목록을 참고하여 설정하면 된다.
라이트모드일 때 사용할 테마와 다크모드일 때 사용할 테마를 개별적으로 설정할 수 있다.
docusaurus.config.js
1module.exports = {2 // ...3 themeConfig: {4 prism: {5 theme: require('prism-react-renderer/themes/github'),6 darkTheme: require('prism-react-renderer/themes/dracula'),7 },8 // ...9 },10};
Navbar

상단에 표시되는 네비게이션 바에는 타이틀과 로고, 네비게이션 아이템들이 있다.
title & logo
docusaurus.config.js
1module.exports = {2 // ...3 themeConfig: {4 navbar: {5 title: 'Site Title',6 logo: {7 alt: 'Site Logo',8 src: 'img/logo.svg',9 srcDark: 'img/logo_dark.svg', // Default to `logo.src`.10 href: 'https://v2.docusaurus.io/', // Default to `siteConfig.baseUrl`.11 target: '_self', // By default, this value is calculated based on the `href` attribute (the external link will open in a new tab, all others in the current one).12 },13 },14 // ...15 },16};
타이틀과 로고는 직관적으로 알 수 있듯이, 타이틀과 logo의 src, alt, href, target 등을 설정하면 된다.
또한 srcDark 라는 키로 다크모드일 때의 이미지도 쉽게 설정할 수 있다는 점이 굉장히 친절하다.
dropdown
기본 Navbar item을 Dropdown을 사용해 계층적으로 사용하고 싶다면, 다음처럼 쉽게 설정할 수 있다.
docusaurus.config.js
1module.exports = {2 // ...3 themeConfig: {4 navbar: {5 items: [6 {7 label: 'Docs',8 position: 'left', // or 'right'9 items: [10 {11 label: 'Category 1',12 to: '...',13 },14 {15 label: 'Category 2',16 to: '...',17 },18 // ... more items19 ],20 },21 ],22 },23 // ...24 },25};

사이드바 유틸 함수로 만들기
사이드바는 Docusaurus 공식 문서처럼 계층적으로 구성할 수 있다.

그런데 사이드바를 구성하기 위해서는 각 문서의 id(파일명)을 직접 추가해주어야 하는데, 문서가 많아지면 일일이 추가하는 것이 번거롭기도 하고, 실수할 수 있기도 하다.
문서가 많거나, 계층 구조가 깊어서 문서를 추가할 때마다 직접 추가하는 것이 번거롭다면, 유틸 함수를 만들어 sidebar.js 를 생성하는 것이 편리한 방법이다.

위의 사진처럼 docs 폴더 하위에 메인 카테고리에 더해 서브 카테고리로까지 분류되는 상황이다. 직접 파일 이름 및 계층 구조를 추가해야 한다면 굉장히 번거로울 것이다.
sidebar.js
1// 디렉토리에 있는 파일 이름 배열을 반환함.2const getFilesOf = (dir) =>3 fs4 .readdirSync(dir)5 .reduce(6 (files, fileName) =>7 fileName.includes('.') ? [...files, fileName] : files,8 [],9 )10 .map((file) => path.parse(file).name);1112// 디렉토리에 있는 디렉토리 목록을 반환함.13const getDirectoriesOf = (dir) =>14 fs15 .readdirSync(dir)16 .reduce(17 (dirs, dirName) => (dirName.includes('.') ? dirs : [...dirs, dirName]),18 [],19 );2021// docs 디렉토리에 있는 카테고리22const categories = getDirectoriesOf('docs');2324// 카테고리를 받아서 하위 카테고리의 목록을 반환하는 함수25const getSubCategories = (category) => getDirectoriesOf(`docs/${category}`);2627// 서브 카테고리 파일들을 Docusaurus의 중첩된 사이드바로 구성28const createSubCategoryItem = (category, subCategory) => ({29 type: 'category',30 label: SUB_CATEGORY_SLUGS[removePriority(subCategory)],31 items: getFilesOf(`docs/${category}/${subCategory}`).map(32 (fileName) => `${category}/${subCategory}/${fileName}`,33 ),34});3536// 카테고리 별로 서브 카테고리의 중첩된 사이드바를 구성37module.exports = categories.reduce(38 (sidebars, category) => ({39 ...sidebars,40 [category]: getSubCategories(category).map((subCategory) =>41 createSubCategoryItem(category, subCategory),42 ),43 }),44 {},45);

이 유틸 함수를 이용해 하위 카테고리까지 중첩된 사이드바를 쉽게 구성할 수 있었다.
또한 GitHub Action을 통해 주기마다 문서를 외부 소스와 동기화하고 있는데, sidebar.js 파일에 직접 추가해주지 않아도 되기 때문에 자동화할 수 있었다.
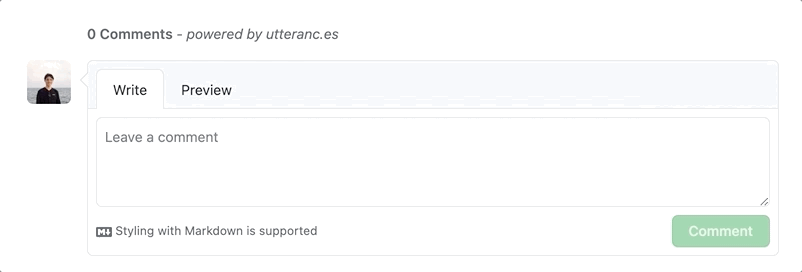
Utterances 연결하기
오픈소스 기술 문서의 경우에는 불필요할 수 있지만, TIL이나, 공동 블로그 등의 학습 목적으로 Docusaurus를 사용할 때, 댓글 기능이 필요할 수 있다.
소셜 댓글 플러그인으로는 Disqus와 Utterances가 대표적인데, 둘 중 Utterances 연결을 적용했다.
Utterances를 적용하기 위해서는 먼저 Github 레포가 public이어야 하고, utterances 앱의 해당 레포지토리 접근을 허용해야 한다.
Utterances를 설정하는 방법은 DocItem 컴포넌트와 BlogPostPage 컴포넌트 최하단에 Utterances 태그를 삽입하는 것인데, 이 컴포넌트들은 Docusaurus 내부에 감춰져있다.
이를 꺼내기 위해서는 swizzle 이라는 커맨드를 사용해야 한다.
1yarn run swizzle @docusaurus/theme-classic DocItem

이 명령어를 사용하면 DocItem 이 내부 컴포넌트이므로 주의를 요하는데, —danger 플래그를 사용해야 꺼낼 수 있다고 한다.
변경 가능성이 있으므로 주의하라는 뜻인데, 내부 컴포넌트를 꺼낸 후에도 삭제하면 다시 원래대로 사용할 수 있다.
따라서 앞으로 docusaurus가 업데이트 될 때, 꺼냈던 컴포넌트를 다시 삭제해야할 수 있음을 기억해야 한다.
Utterances만 간단히 추가하기 위해 —danger 플래그를 붙여 DocItem 과 BlogPostPage 를 swizzle 한다.
1yarn run swizzle @docusaurus/theme-classic DocItem --danger2yarn run swizzle @docusaurus/theme-classic BlogPostPage --danger
명령어를 실행시키고 나면 src/theme 디렉토리에 내부 컴포넌트인 BlogPostPage 와 DocItem 컴포넌트가 생성된 것을 확인할 수 있다.

그리고 Utterances를 사용하기 위해 src 디렉토리 하위에 components 디렉토리를 생성하고, Comment.js 파일을 다음과 같이 생성한다.
src/components/Comment.js
1import React, {useEffect, useRef} from 'react';23function Comment() {4 const containerRef = useRef(null);56 useEffect(() => {7 const createUtterancesEl = () => {8 const script = document.createElement('script');910 script.src = 'https://utteranc.es/client.js';11 script.setAttribute('repo', '{username}/{repository name}');12 script.setAttribute('issue-term', 'title');13 script.setAttribute('label', 'comment');14 script.setAttribute('theme', 'github-light');15 script.crossOrigin = 'anonymous';16 script.async = true;1718 containerRef.current.appendChild(script);19 };2021 createUtterancesEl();22 }, []);2324 return <div ref={containerRef} />;25}2627export default Comment;
useEffect 훅에서 utterances 스크립트를 생성하고 container 하위로 삽입하는 코드이다.
issue-term 은 댓글 추가시 생성되는 깃헙 이슈 이름으로, pathname , url , title 으로 할 수 있는데, pathname 과 url 은 한글(유니코드)인 경우 깨질 수 있으므로 title 을 사용했다.
이제 생성한 Comment 컴포넌트를 DocItem 과 BlogPostPage 컴포넌트의 적절한 위치에 추가해주면 된다.
DocItem- https://github.com/younho9/TIL/blob/main/src/theme/DocItem/index.jsBlogPostPage- https://github.com/younho9/TIL/blob/main/src/theme/BlogPostPage/index.js

Utterances에 다크모드 Toggle 적용
위의 Comment 컴포넌트는 github-light 테마로 고정되어, Docusaurus가 기본적으로 지원하는 다크모드 Toggle 기능이 반영되지 않는다.
이를 반영하기 위해 Comment.js 를 다음과 같이 수정한다.
Comment.js
1import React, {useEffect, useRef} from 'react';2import useThemeContext from '@theme/hooks/useThemeContext';34const utterancesSelector = 'iframe.utterances-frame';56function Comment() {7 const {isDarkTheme} = useThemeContext();8 const utterancesTheme = isDarkTheme ? 'github-dark' : 'github-light';9 const containerRef = useRef(null);1011 useEffect(() => {12 const utterancesEl = containerRef.current.querySelector(utterancesSelector);1314 const createUtterancesEl = () => {15 const script = document.createElement('script');1617 script.src = 'https://utteranc.es/client.js';18 script.setAttribute('repo', '{username}/{repository name}');19 script.setAttribute('issue-term', 'title');20 script.setAttribute('label', 'comment');21 script.setAttribute('theme', utterancesTheme);22 script.crossOrigin = 'anonymous';23 script.async = true;2425 containerRef.current.appendChild(script);26 };2728 const postThemeMessage = () => {29 const message = {30 type: 'set-theme',31 theme: utterancesTheme,32 };3334 utterancesEl.contentWindow.postMessage(message, 'https://utteranc.es');35 };3637 utterancesEl ? postThemeMessage() : createUtterancesEl();38 }, [utterancesTheme]);3940 return <div ref={containerRef} />;41}4243export default Comment;
Docusaurus는 useThemeContext 라는 훅을 제공하여 현재 테마를 가져올 수 있고, 이 테마에 따라 Utterances 스크립트를 마운트한다.
그리고 utterancesTheme 변수가 변경된다면, 기존에 마운트되어 있는 Utterances iframe을 찾아서, postMessage 로 테마 변경을 전달한다.
Algolia 검색 연결하기
Docusaurus는 Algolia DocSearch 와 연결하여 검색 기능을 추가할 수 있다. Algolia DocSearch는 24시간 마다 해당 웹사이트를 크롤링하여 Algolia 인덱스에 저장하고, 해당 웹사이트에서 Algolia API를 사용해서 검색할 수 있도록 한다.
Docusaurus 공식 문서는 DocSearch에 지원해서 사용하는 방법을 알려주는데, 이 지원 요청을 승인 받기 위해선 기술 문서여야 하고, 오픈소스여야 한다. 승인 받을 수 있다면, 이를 사용해서 쉽게 Algolia 검색 기능을 추가할 수 있다.
승인되지 않았더라도, 직접 크롤링하여 Algolia 검색 기능을 사용할 수 있는데, 해당 방법이 아래 링크에 설명되어 있다.
Algolia 설정
먼저 Algolia 에 회원가입하고, Free를 사용한다.

그리고 대시보드의 Indices로 이동하여, index를 생성한다. 지금은 mytil 이라는 이름으로 index를 생성했다.

그리고 대시보드에서 API Keys 로 이동한 뒤에, 다음과 같이 옵션을 설정하여 API Key를 생성한다. ACL에서 addObject , editSettings , deleteIndex 를 추가하는 것에 유의한다. Indices 는 비워두어도 된다.

웹사이트 크롤링
이제 배포된 Docusaurus 앱을 docker 이미지를 통해 크롤링할 것이다.
프로젝트의 루트 디렉토리에 .env 파일을 생성하고, Algolia의 Application ID와 생성한 API_KEY의 환경 변수를 세팅한다.

그리고 루트 디렉토리에 config.json 파일을 생성하고, 아래 링크로 이동하여 내용을 복사한 후, 붙여넣기한다.
config.json 파일에서 프로젝트에 맞게 변경해야 할 부분은 index_name , start_urls , sitemap_urls 이다.
index_name은 Algolia에서 생성한 index의 이름start_urls는 배포된 문서의 urlsitemap_urls는 배포된 문서의 사이트맵의 url- 기본적으로 Docusaurus는 루트 경로에
sitemap.xml을 생성해주므로{BASE_URL}/sitemap.xml
- 기본적으로 Docusaurus는 루트 경로에

이제 DocSearch 문서의 설명을 따라 Docker 이미지를 사용하여 웹사이트를 크롤링하면 된다.
도커를 설치한 후, 프로젝트 루트 디렉토리에서 다음 명령어를 실행한다.
1docker run -it --env-file=.env -e "CONFIG=$(cat ./config.json | jq -r tostring)" algolia/docsearch-scraper

명령어 실행이 성공적으로 되었다면 다음과 같이 표시된다.

그리고 Algolia의 대시보드로 이동하면, Record가 잘 기록된 것을 볼 수 있다.
그리고 docusaurus.config.js 에 Algolia 설정을 추가하면 되는데, 이 때 사용하는 API Key는 생성한 API Key가 아니라 검색 전용 API Key이다.
Application ID와 Search-Only API Key는 클라이언트에서 노출되어도 상관없다. 하지만 admin API Key는 노출되어선 안된다.

docusaurus.config.js
1module.exports = {2 ...3 themeConfig: {4 algolia: {5 apiKey: 'df534cd50449ff1ac456585231e62076',6 indexName: 'mytil',7 appId: 'CPGK41PHIV',8 contextualSearch: true,9 },10 ...11 }12 ...13}
이를 커밋한 후 푸시하여 배포된 사이트에서 검색이 잘 동작하는지 확인할 수 있다.

PWA 설정하기

PWA는 Progressive Web App의 약자로, 웹페이지를 앱처럼 사용할 수 있는 기술이다.
Docusaurus는 PWA Plugin으로 쉽게 문서를 PWA로 구현할 수 있다.
다음의 명령어로 plugin-pwa를 설치한다.
1yarn add @docusaurus/plugin-pwa
./static/manifest.json 파일을 생성한다.
1{2 "name": "younho9 TIL",3 "short_name": "📝 TIL",4 "theme_color": "#5468ff",5 "background_color": "#424242",6 "display": "standalone",7 "scope": "./",8 "start_url": "./index.html",9 "icons": [10 {11 "src": "img/icons/icon-72x72.png",12 "sizes": "72x72",13 "type": "image/png"14 },15 {16 "src": "img/icons/icon-96x96.png",17 "sizes": "96x96",18 "type": "image/png"19 },20 {21 "src": "img/icons/icon-128x128.png",22 "sizes": "128x128",23 "type": "image/png"24 },25 {26 "src": "img/icons/icon-144x144.png",27 "sizes": "144x144",28 "type": "image/png"29 },30 {31 "src": "img/icons/icon-152x152.png",32 "sizes": "152x152",33 "type": "image/png"34 },35 {36 "src": "img/icons/icon-192x192.png",37 "sizes": "192x192",38 "type": "image/png"39 },40 {41 "src": "img/icons/icon-384x384.png",42 "sizes": "384x384",43 "type": "image/png"44 },45 {46 "src": "img/icons/icon-512x512.png",47 "sizes": "512x512",48 "type": "image/png"49 }50 ]51}
또한 manifest.json 에서 설정한 ./static/img/icons 경로에는 icon을 사이즈별로 생성해주면 되는데 이 때 favicon-generator 사이트를 사용하면 편리하다.
그리고 docusaurus.config.js 에 @docusaurus/plugin-pwa 를 추가한다.
docusaurus.config.js
1plugins: [2 ...[3 '@docusaurus/plugin-pwa',4 {5 debug: true,6 offlineModeActivationStrategies: ['appInstalled', 'queryString'],7 pwaHead: [8 {9 tagName: 'link',10 rel: 'icon',11 href: '/img/logo.png',12 },13 {14 tagName: 'link',15 rel: 'manifest',16 href: '/manifest.json', // your PWA manifest17 },18 {19 tagName: 'meta',20 name: 'theme-color',21 content: 'rgb(84, 104, 255)',22 },23 {24 tagName: 'meta',25 name: 'apple-mobile-web-app-capable',26 content: 'yes',27 },28 {29 tagName: 'meta',30 name: 'apple-mobile-web-app-status-bar-style',31 content: '#000',32 },33 {34 tagName: 'link',35 rel: 'apple-touch-icon',36 href: 'img/logo.png',37 },38 {39 tagName: 'link',40 rel: 'mask-icon',41 href: 'img/logo.svg',42 color: 'rgb(255, 255, 255)',43 },44 {45 tagName: 'meta',46 name: 'msapplication-TileImage',47 content: 'img/logo.png',48 },49 {50 tagName: 'meta',51 name: 'msapplication-TileColor',52 content: '#000',53 },54 ],55 },56 ],57];


PWA를 설정했다.
마치며…
이번 글에서는 간단한 테마 커스터마이징, 유틸 함수를 활용한 사이드바 관리 방법, Utterances 소셜 댓글 추가 방법, Algolia 검색 연결 방법, PWA 설정 등을 다루었다.
테마 설정, Algolia 검색 연결, PWA 설정 등 Docusaurus가 지원하는 기능에 대해서는 추상화가 잘 되어 있어서 플러그인처럼 쉽게 붙일 수 있었다.
또한 Utterances 소셜 댓글처럼 Docusaurus가 지원하지 않는 기능이라도, swizzle 커맨드를 통해 쉽게 리액트 컴포넌트를 추출하여 커스텀할 수 있었다.
리액트에 익숙하고, 기술 문서를 관리한다면 Docusaurus를 통해 웹페이지를 생성해보자.

